Construction lines
The shape creator works by defining construction lines that will let the tool know where are the major facial features of your mesh.
In your Scene view, make sure you have Gizmos shown, and move your Scene view to focus on the face of your avatar.

Facial structures
The examples in this document will show three avatars (Karin, Foshunia, and Actias) as supporting examples.
These three avatars have different facial structures. Use them as references for your own construction lines.
Setup construction lines: Points
Mouth Commissure
The mouth commissure is the tip of your lips.
- Press the “Select Vertex…” button and click on your scene to select the tip of your lips.
Does it not work?
If this step doesn’t work on your avatar, make sure that the “Avatar Root” is correctly set.
The Avatar Root is the object where the Animator is located. It is NOT the Armature.
If it still doesn’t work, ping me on the Discord server!
- Press “Stop” when you are done.
You can further adjust the position with the handle in the scene view if necessary.
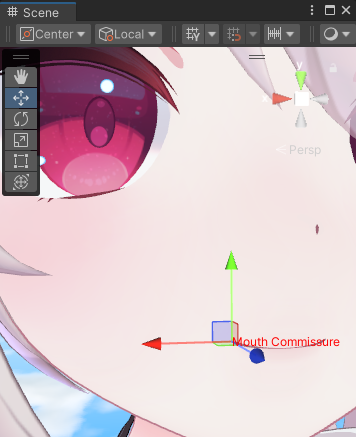
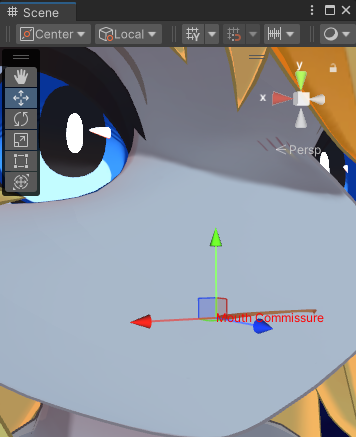
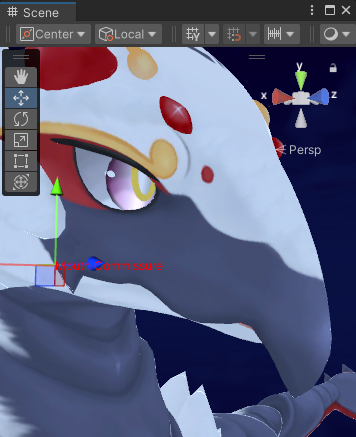 On furry avatars, the tip of your lips may be located behind your eyes. This is fine.
Everything happens on the right-hand side of the face (the left side of your screen)
With some rare exceptions, most actions that you will do relates to pulling and pushing on the right-hand side of the face,
which is the left-hand side of your screen.
Mouth Center
The mouth center is the middle of the lips.
- Do the same as previously described using the “Select Vertex…” button.
- The point doesn’t need to be precisely on a vertex. If your lips are not fully closed together, you can move the gizmo to be somewhere between.
The mouth center is guaranteed to be in the middle of your avatar.
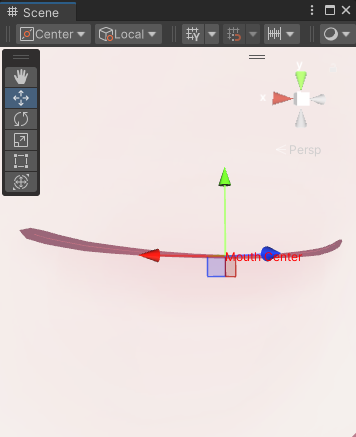
 If your lips is slightly curved forwards, the mouth center still remains on the visible part of your lips; it is not inside your mouth.
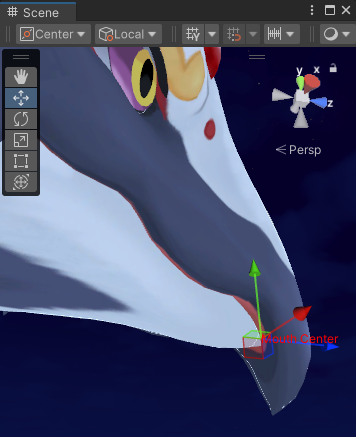 On furry avatars, the center should be on the tip of the bottom jaw, not the beak or the snout itself.
Cheek
The cheek is a general location of your cheeks.
It is mainly used later for puffing the cheeks.
- Do the same as previously described using the “Select Vertex…” button.
- Don’t think too much about this, and just put the cheek somewhere around the same level as your lips.
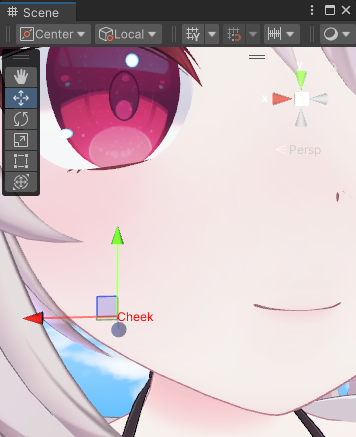
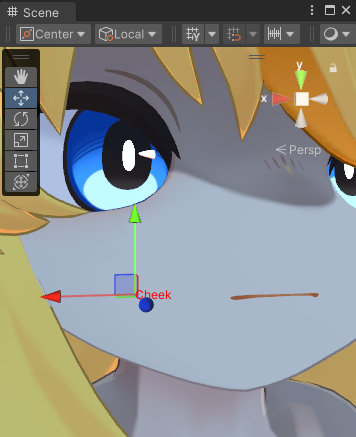
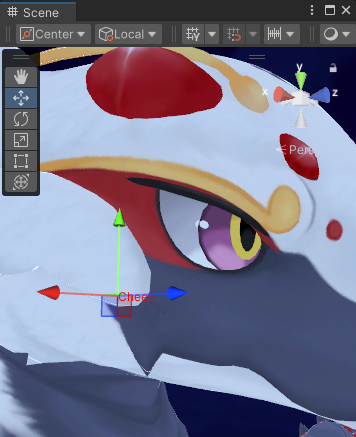 The location of your cheek may be up to interpretation. Don't necessarily follow this example, experiment with it.
Maybe it should be more towards the back.
The location of your cheek may be up to interpretation. Don't necessarily follow this example, experiment with it.
Maybe it should be more towards the back.
Nose
The nose is the tip of your nose.
- Do the same as previously described using the “Select Vertex…” button.
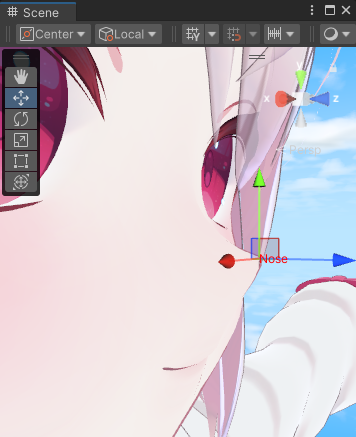
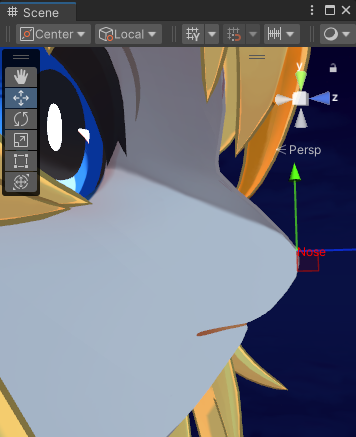
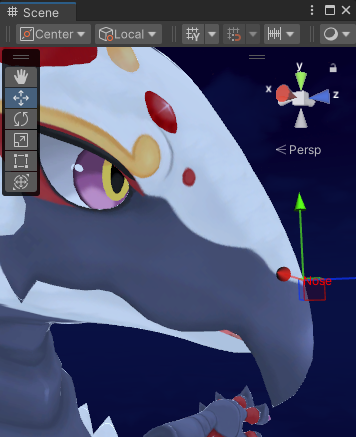 If the location of the nose is ambiguous, put it somewhere over the tip of the jaw.
Jaw Puller
The jaw puller is roughly located on your chin. It will be used to move the jaw of your avatar.
- Do the same as previously described using the “Select Vertex…” button.
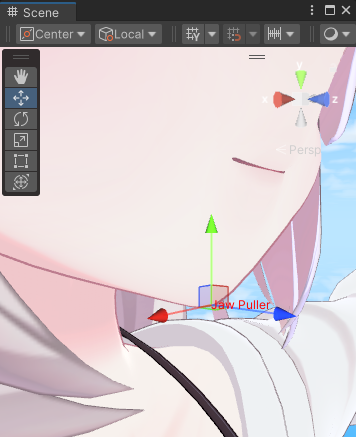
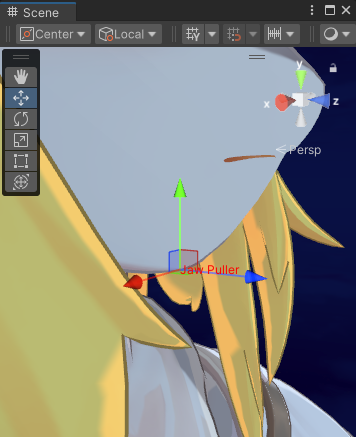
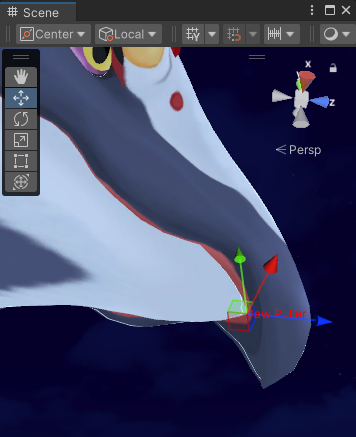 On furry avatars that have a long face structure, put it on the tip of the bottom jaw.
Setup construction lines: Dividers
Dividers provide hints on how to divide existing shapes in half.
Eye Visualization
This construction line has been added in 0.9.
In eye visualization, you will select a blendshape that moves the eyelashes. This blendshape is used for the next step so that we can actually visualize our edits.
I recommend that you simply choose a blendshape that closes both of your eyes.
This blendshape is not used during the build, it is purely for visualization purposes.
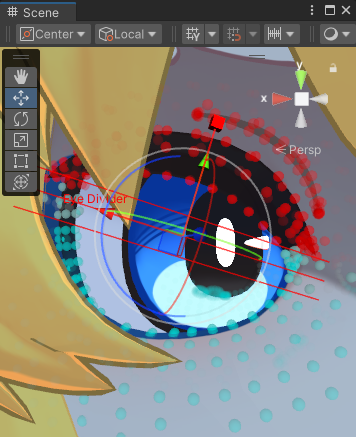
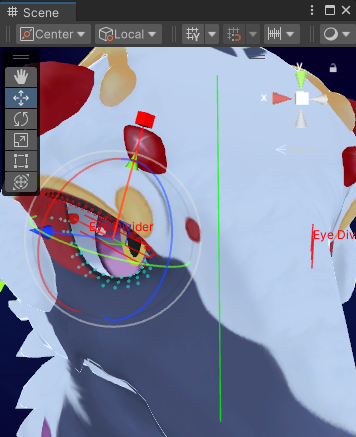
Eye Divider
The eye divider splits the eye in half, so that there is the top half and the bottom half of the eye.
This will be used to cut existing artist-authored blendshapes in half, so that you can derive new animations by combining existing blendshapes.
- Press the “Select Vertex…” button and click somewhere in the middle of the eye.
- Press “Stop” when you are done.
- Move and rotate the gizmo to better match your eye shape.
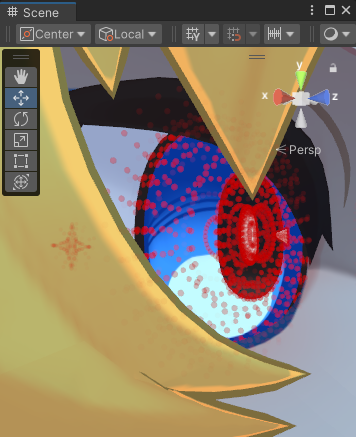
- Use the red cubic handle to shift the red parallel lines closer or further apart. The area inside that region will be smoothed when dividing the blendshapes. The lines need to be apart so that there is not an abrupt cut when dividing the blendshapes, but it must not go past the most sensitive parts of the top and bottom eyelids.
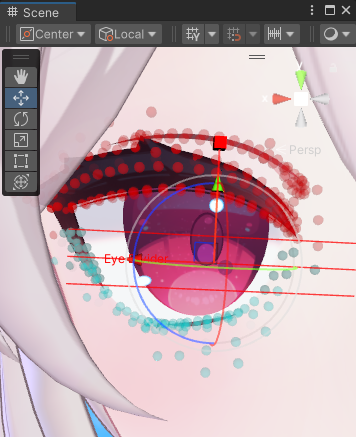 Try to make the parallel lines roughly cross through the middle, but don't let the parallel lines interfere with the top and bottom eyelid.
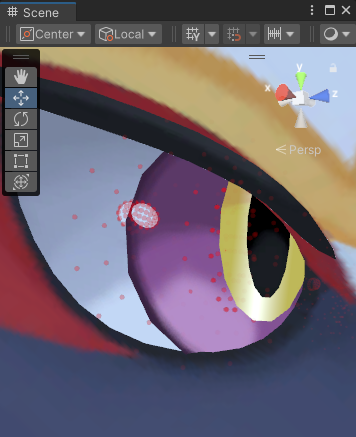
 Eye shapes can vary a lot. A guidance is to follow the direction of the top part of the eyelid. Rotate the gizmo along the blue axis if necessary.
 If the left and right side of the face are at a sharp angle, rotate the gizmo around the green axis so that you can better visualize it.
Mouth Divider
The mouth divider splits the mouth in half, so that there is the upper and lower lips.
This will be used to morph only the upper lips or only the lower lips when necessary.
In order to use this divider, we need to open the mouth first.
- Press “Add +” to add an existing blendshape.
- Set the blendshape to one that represents the jaw being open. You need to look at your avatar blendshapes to select one that fits. You can use Blendshape Viewer to help you with this.
Then:
- Press the “Select Vertex…” button and click the vertex used in the corner of your mouth.
- Move and rotate the gizmo so that the parallel lines, but keep it as horizontal as you can.
- Use the red cubic handle to shift the red parallel lines closer or further apart. The area inside that region will be smoothed. The lines need to be apart so that there is not an abrupt cut, but it must not go past the most sensitive parts of the top and bottom lips.
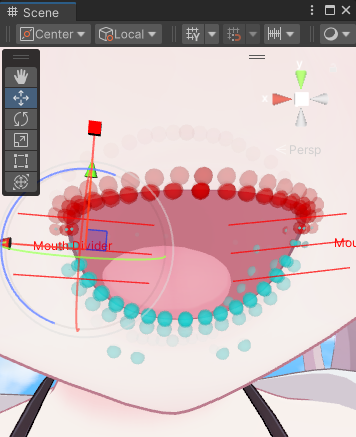 The middle line of the mouth divider should go through the vertex that is located on the mouth commissure.
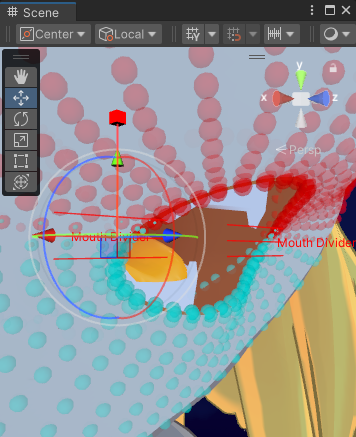
 If your avatar has a beak, make sure that the divider does not cross the beak.
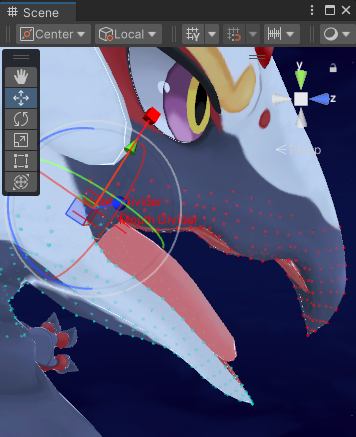
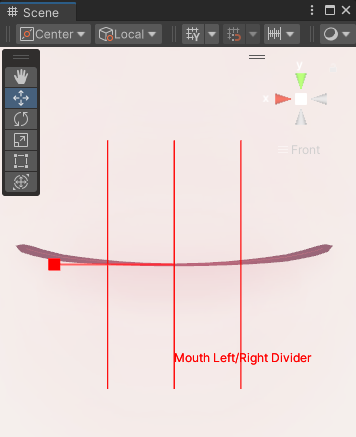
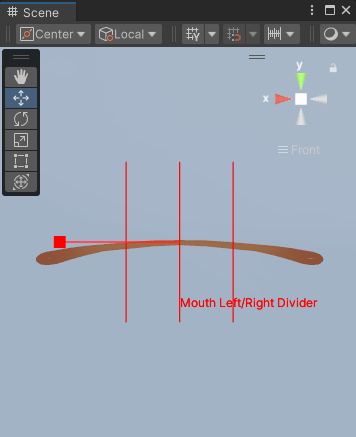
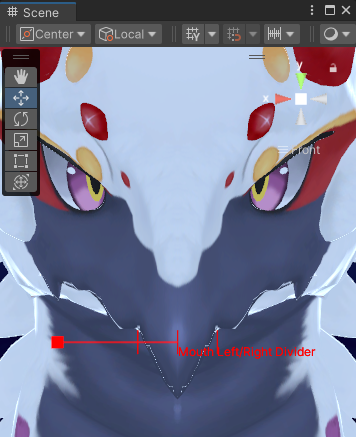
Mouth Left/Right Divider
The mouth Left/Right divider is used to split some of our shapes that strictly divide the face in half.
Many of our shapes can pull the right-side of the face while affecting the left side of the face, but some cannot do this if it involves moving a muscle in the middle of the face.
- Use the red cubic handle to shift the red parallel lines closer or further apart. The area inside that region will be smoothed.
- The lines need to be apart so that there is not an abrupt cut.
- The divider must smooth the middle of the lips, but not the entire length of the lips.
Optional: Nose Projection
The Nose Projection is an optional divider. Most of the times the Nose Projection will not be necessary, but some of the deformation may accidentally affect the nose too much. In those cases, you may be able to use the Nose Projection to reduce the influence the deformation of the nose.
- Press the “Select Vertex…” button and click on your nose.
- Press “Stop” when you are done.
- Use the handle to push the division plane towards your nose.
- Use the red handles to reduce the selection in the X (red) and Y (green) directions. Keep the rectangle away from your forehead or cheeks.
- If you need more control, rotate the handle to skew the selection.
- Use the red cubic handle to shift the red parallel lines closer or further apart. The area inside that region will be smoothed.
- The lines need to be apart so that there is not an abrupt cut.
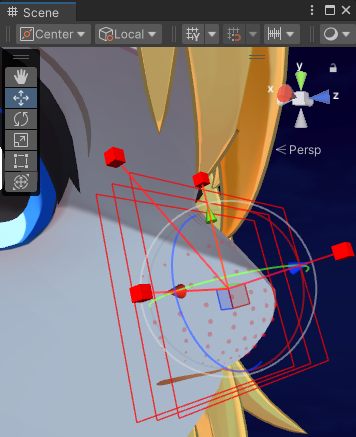 The limits of the rectangle matters, so that it doesn't include the forehead.
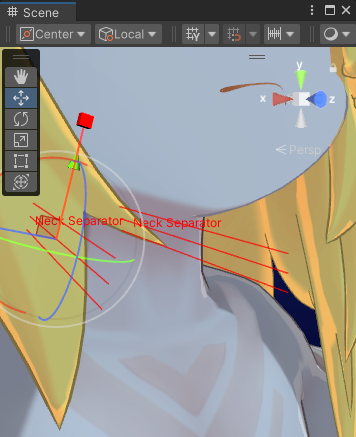
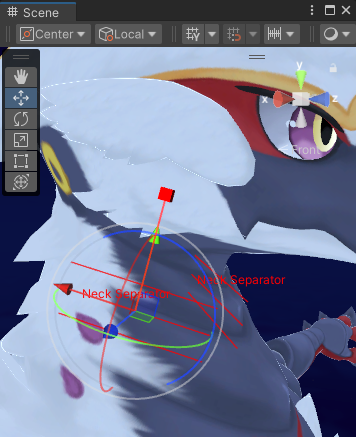
Optional: Neck Separator
The Neck Separator is an optional divider. Use it if your face mesh includes part of your neck or upper body. This is useful if some deformations of the jaw affect too much of the neck.
For example, some avatars, especially those modelled after animals, have a neck that is inseparable from the upper body.
- Press the “Select Vertex…” button and click on the side of your neck.
- Press “Stop” when you are done.
- Rotate the handle to better divide your neck.
- Use the red cubic handle to shift the red parallel lines closer or further apart. The area inside that region will be smoothed.
- The lines need to be apart so that there is not an abrupt cut.
Most avatars that aren't based on animals have a face separate from the body, so it is not necessary to set up a neck separator on those.
Setup construction lines: Vertex filters
Some parts of the face shouldn’t be affected by some types of deformations.
- Moving the lips should not deform the teeth or the tongue.
- Moving the cheeks should not deform the pupils (in most cases).
- Some artist-authored eye blendshapes deform the pupils, but this is a problem when dividing the eye blendshapes in half.
Vertex filters are used to isolate parts of your face so that they remain unaffected by some deformations and other operations.
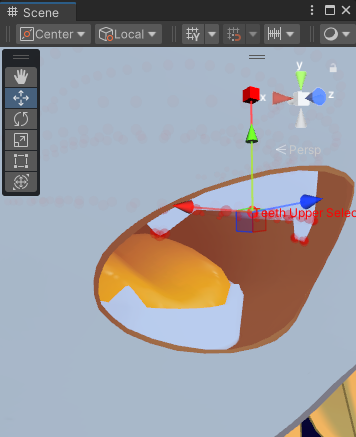
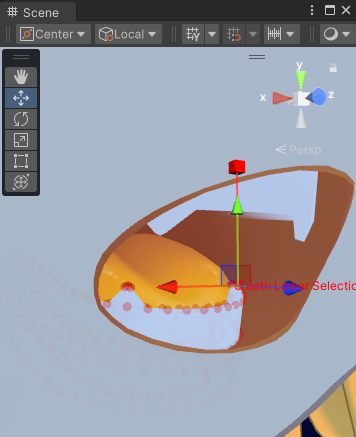
Upper Teeth and Lower Teeth Selection
You need to do the teeth selection separately for the upper teeth and the lower teeth.
Select the teeth (and fangs, if you have some).
- Press “Add +” to add a vertex selection.
- Press the “Select Vertex…” button and click on the teeth at the bottom of your mouth.
- Press “Stop” when you are done.
If you have fangs, press “Add +” and do this again with your fangs. Some avatars don’t have perfectly symmetrical fangs, so make sure you have selected all of the fangs of your avatar.
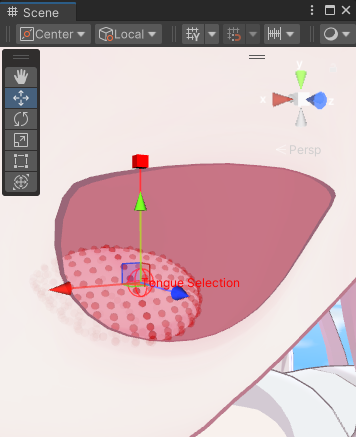
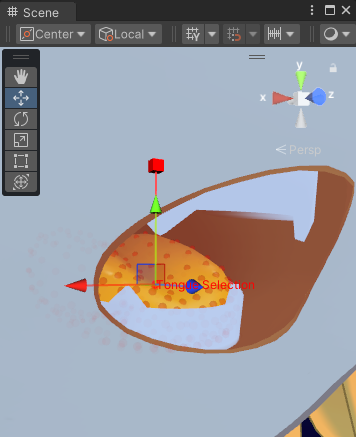
Tongue Selection
Select your tongue (and tongue piercings if you have some).
- Press “Add +” to add a vertex selection.
- Press the “Select Vertex…” button and click on your tongue.
- Press “Stop” when you are done.
If you have piercings on your tongue, press “Add +” and do this again on your piercings.
You must select the tongue, even if your hardware or software doesn't support tongue tracking.
Selecting the tongue prevents shapes that affect the lips from affecting the tongue.
Pupil Selection
To select the pupil and iris, you can do it in two ways:
- The recommended way is to click “Add +” on the lower section named Pupil Blendshapes, and select some of the artist-authored blendshapes that:
- Moves the iris,
- Moves the pupil (i.e. blendshapes that make the pupil go big or small),
- Moves the highlights of the pupil,
- Moves the alternative decorations of the pupil (star shape, heart shape, vortex (guru guru), etc.),
- but, must NOT move the white interior of the eye, and must NOT move the eyelids.
- In some cases there may not be such artist-authored blendshapes. In this case, click “Add +” on the Pupil Vertices and select the pupil vertices.
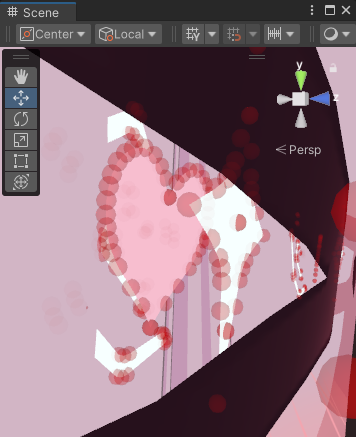
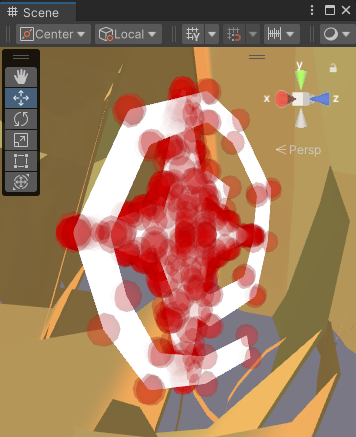
- Many avatars do not have symmetrical eye highlights, so make sure you select the highlights on both the left eye and right eye separately.
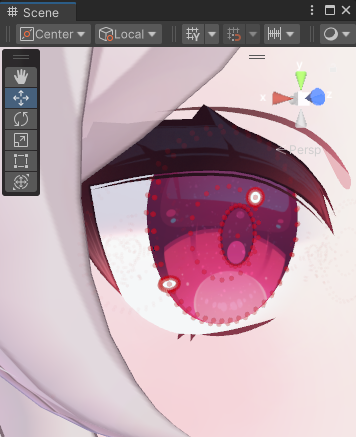
Make sure you include the decorations inside your eye.
Setup construction lines: Special
There are some special cases.
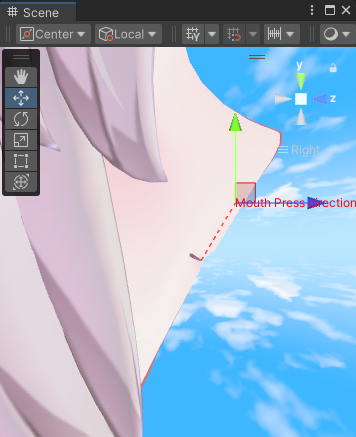
Mouth Press direction
The mouth press direction is always relative to the Mouth Center, and represents the inclination of the face.
This construction line is used by the Mouth Press shape as a hint to know how the lips should be compressed together.
- Decide whether you want to shift the press direction forward or not to better match the shape of your avatar. Results may vary.
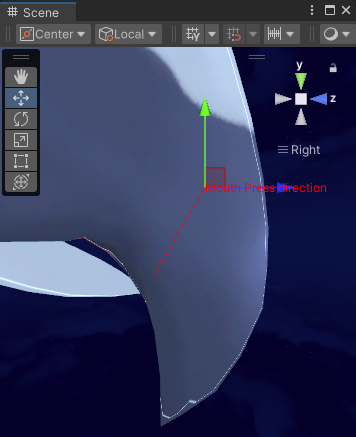
 The mouth press direction is down to preference. You can keep it vertical, or make it angled.
 The mouth press direction is down to preference. If your mouth is slightly curved forwards, you can try to keep the mouth press direction perpendicular to that lip curve.
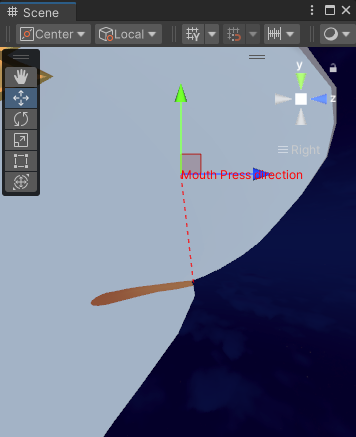
 On furry avatars with long beaks or snouts, it may be relevant to keep the mouth press direction perpendicular to the direction of that beak or snout.
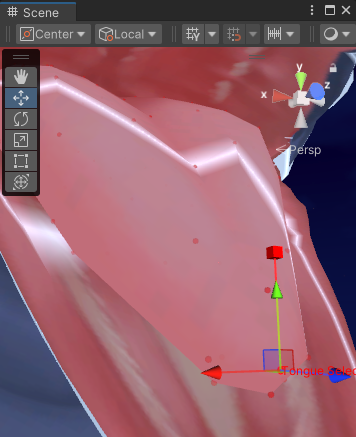
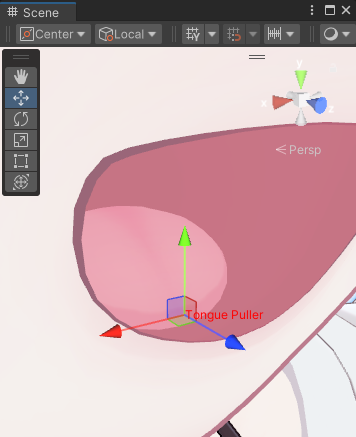
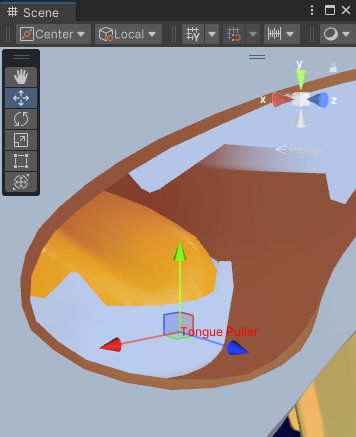
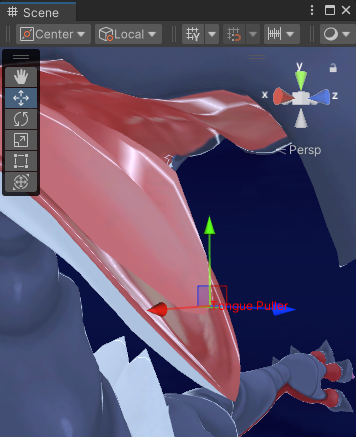
Tongue Puller
The tongue puller represents the position of the tongue as it rests when the avatar’s jaw is open.
- Press the “Select Vertex…” button and click somewhere near the tip of the tongue.
- Press “Stop” when you are done.
You can further adjust the position with the handle in the scene view if necessary.
Optional: Blush Modifier Selection
This feature has been added in 0.8.0.
Blush Modifier represents blendshapes hidden inside your head, which you can use to make your character blush.
When you squint, or when you puff your cheeks, we will deform these blush blendshapes so that they don't clip through your cheeks.
When blendshapes are added to the Blush Modifier Selection, the blendshape will be internally simulated to be visible, so that they will be moved by the following shapes:
- Cheek Squint
- Cheek Puff
Select all the individual blush blendshapes that you use on your avatar.
Unfortunately, this will not work with all avatar bases.
The density of the blush mesh needs to be similar (or half as similar) to the face mesh itself. If it's a gigantic polygon, it will not work so well.